1 Antivirus Setup Before Installation (Windows)
Add the folder containing the installer to the exclusion list in Windows Security (built into Windows 10 / 11).
Open the Start menu, type Windows Security in the search box, and click the app that appears in the results.
On the Windows Security home screen, click Virus & threat protection (shield icon) from the left-hand navigation panel.
On the Virus & threat protection page, look for the "Virus & threat protection settings" section (not the top "Current threats" section) and click Manage settings underneath it.
Scroll down on the settings page until you reach the "Exclusions" section near the bottom. Click Add or remove exclusions.
Click the + Add an exclusion button, then select Folder from the dropdown menu.
A folder picker dialog will open. Navigate to and select the folder where you saved (or plan to save) the installer — for example, your Desktop or Downloads folder. Click Select Folder to confirm.
The selected folder path will now appear in the exclusion list. Once you see it listed there, the setup is complete.
When running the installer, a screen titled "Windows protected your PC" (SmartScreen) may appear. This is a separate Windows feature for verifying publisher signatures — it is not a virus warning. Follow the steps below to proceed.
-
Click More info
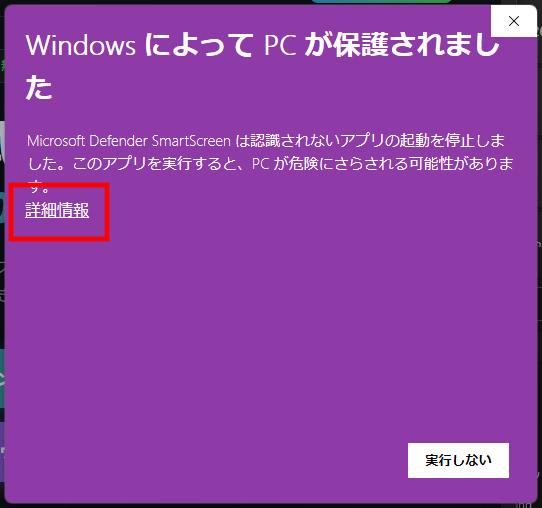 ① SmartScreen warning screen — click "More info"
 -
The app name and publisher will appear along with a Run anyway button — click it to continue
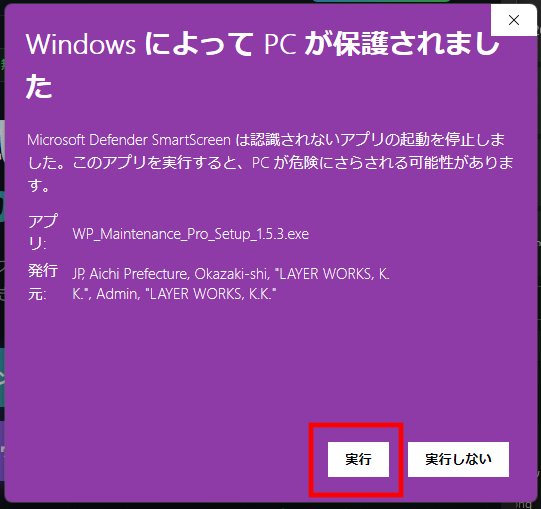 ② Click "Run anyway" to start installation
The basic process is the same for all antivirus programs. Look for "Exceptions", "Exclusions", "Trusted programs", or "Whitelist" in your software's settings and add the folder containing the installer.
- Open Norton and go to Settings
- Click Antivirus → Scans and Risks → Exclusions / Low Risks
- Add the installer folder under "Items to Exclude from Scans"
- Open McAfee → PC Security → Real-Time Scanning
- Click Excluded Files → Add file
- Select the installer folder
- Open Trend Micro and click the gear icon (Settings)
- Click Exception List → Files and Folders tab
- Click Add and register the installer folder
- Open Avast (or AVG) → Menu → Settings
- Click General → Exceptions
- Click Add exception and select the installer folder
- Open ESET → Setup → Advanced setup (F5)
- Click Detection engine → Exclusions → Performance exclusions → Edit
- Click Add and enter the installer folder path
2 Installation (Windows)
Click the Download button on the official site (wpmm.jp/en) to download the Windows installer (WP_Maintenance_Manager_Setup.exe).
-
Click the > button on the right side of the notification to open the detail menu
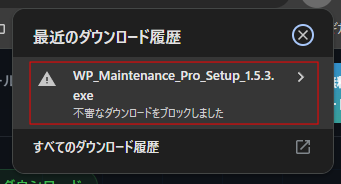 ① Chrome notification showing "Dangerous download blocked" — click ">"
 -
Click Keep anyway (or "Download unsafe file") to proceed
 ② Click "Keep anyway" to continue the download
-
Click the … (More options) button on the right side of the download notification
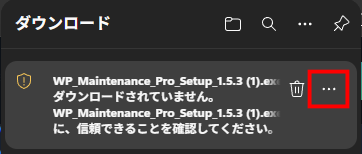 ① Edge notification showing "Not downloaded" — click "…"
 -
Select Keep from the dropdown menu
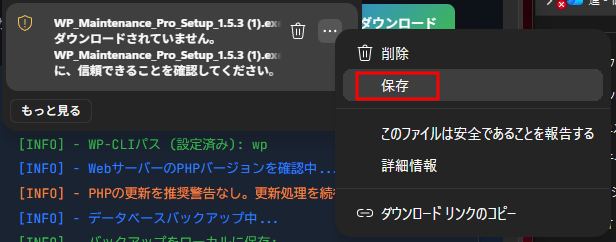 ② Select "Keep"
 -
When the confirmation dialog appears, click Keep anyway to complete the download
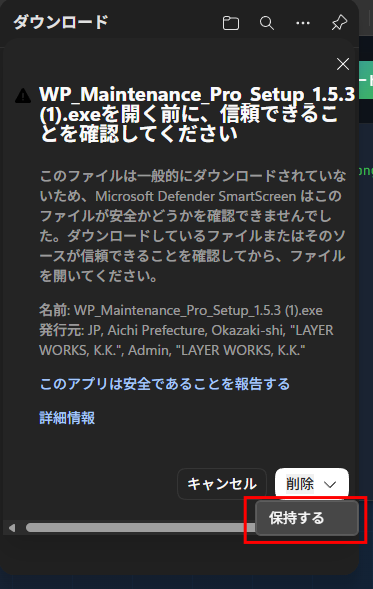 ③ Click "Keep anyway" in the confirmation dialog
Double-click the downloaded installer to launch it.
A dialog saying "Do you want to allow this app to make changes to your device?" (User Account Control / UAC) will appear when the installer launches. This is a standard Windows security confirmation. Click Yes to continue.
Follow the on-screen instructions. When a Finish button appears, installation is complete. A shortcut to "WP Maintenance Manager" will be created on your Desktop or Start menu. Double-click it to launch.
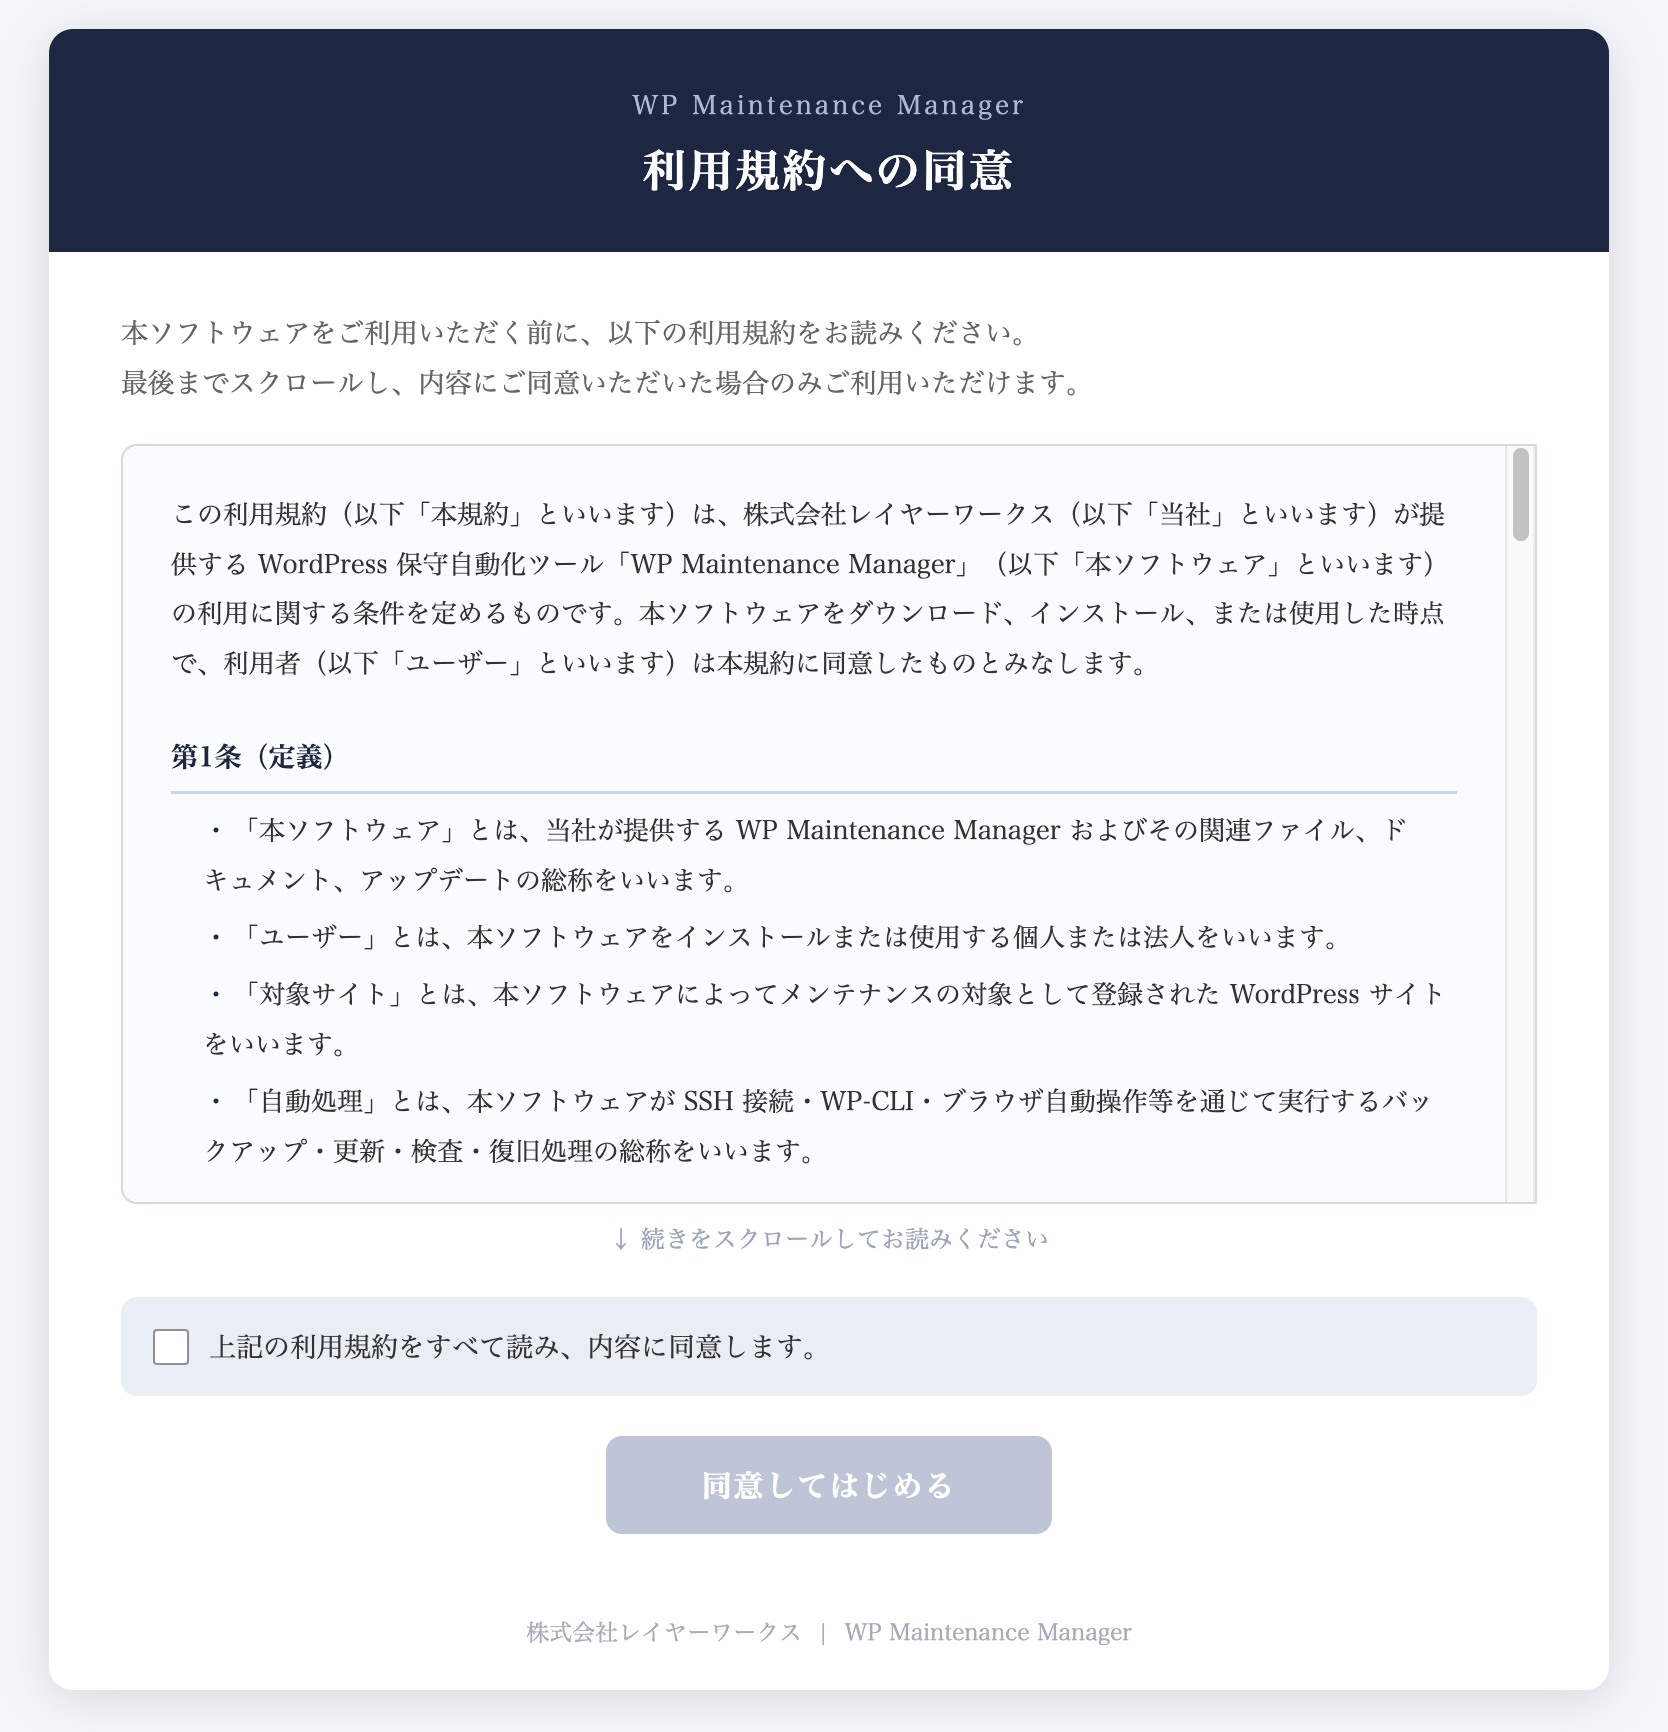
3 First Launch & License Setup
On first launch, the Terms of Service screen will appear. Please read through the terms and click Agree and Continue to proceed.
After agreeing to the Terms of Service, the email registration screen will appear. Enter your email and click the Register button. A verification email will be sent — click the link in the email to complete verification. Once verified, the app will automatically proceed to the next screen.
If you have a paid plan license key, enter it in the "License Key" field in Settings and click Authenticate. Once verified, features corresponding to your plan will become available.
! Troubleshooting (Windows)
If Windows Defender "quarantined" a file, it hasn't been permanently deleted — it's temporarily held. You can restore it with the following steps:
- Open Windows Security as in STEP 1-1, Steps 1–2, and go to Virus & threat protection. Click Protection history
- Look for an item with WP_Maintenance in the filename. If not visible, use the Filters button to set the time range to "All time"
- Click the item to expand details, then choose Actions → Restore. Click Yes if a confirmation dialog appears
- After restoring, complete the exclusion setting in STEP 1-1 before re-running the installer
Open your antivirus software's "Quarantine", "Isolation folder", or "Threat history" and choose "Restore with exclusion" or "Trust". If you are unsure how, first set up the exclusion in STEP 1-3, then re-download the latest installer from the official site and try again.
Symptom Checklist (Windows)
| Symptom | Solution |
|---|---|
| Installer disappears when run | STEP 1-1 (add exclusion) → re-download → STEP 2 |
| Blue SmartScreen warning stops the install | STEP 1-2 ("More info" → "Run anyway") |
| App won't launch after install | T-1 (restore from quarantine) → add exclusion → reinstall |
| Antivirus keeps warning repeatedly | STEP 1-3 (exclusion for your specific software) |
1 Installation (Mac)
Click the Download button on the official site (wpmm.jp/en) to download the Mac installer (WP_Maintenance_Pro.dmg). It will typically be saved to your Downloads folder.
- Double-click the downloaded
.dmgfile to open it - Drag the app icon in the direction of the arrow onto the Applications folder to install it
- Once copied, close the window. You can move the
.dmgfile to the Trash
Launch WP Maintenance Pro from Launchpad or the Applications folder in Finder.
On first launch, you may see a dialog: "WP_Maintenance_Pro.app is an app downloaded from the Internet. Are you sure you want to open it?" — click Open. This prompt will not appear again.
If the app launches successfully, the Terms of Service screen will appear.
2 First Launch & License Setup
On first launch, the app will prompt you to register an email address. Enter your email and click the Register button. A verification email will be sent — click the link in the email to complete verification. Once verified, the app will automatically proceed to the next screen.
If you have a paid plan license key, enter it in the "License Key" field in Settings and click Authenticate. Once verified, features corresponding to your plan will become available.
! Troubleshooting (Mac)
Quit the app, restart your Mac, then try launching again. If the problem persists, feel free to ask our AI chatbot in the bottom right of the screen.
Symptom Checklist (Mac)
| Symptom | Solution |
|---|---|
| App won't launch / screen goes blank | T-1 (restart Mac → ask chatbot) |
Need help? Ask our AI assistant
For any questions about installation, feel free to use the chatbot in the bottom right. Just describe your issue and it will guide you through the solution.
Click the chat icon in the bottom right corner